Basic Programming Functions
Getting IMU Information
Running the Example
After powering on OriginMan, you can start the following command in MoboXterm or VSCode:
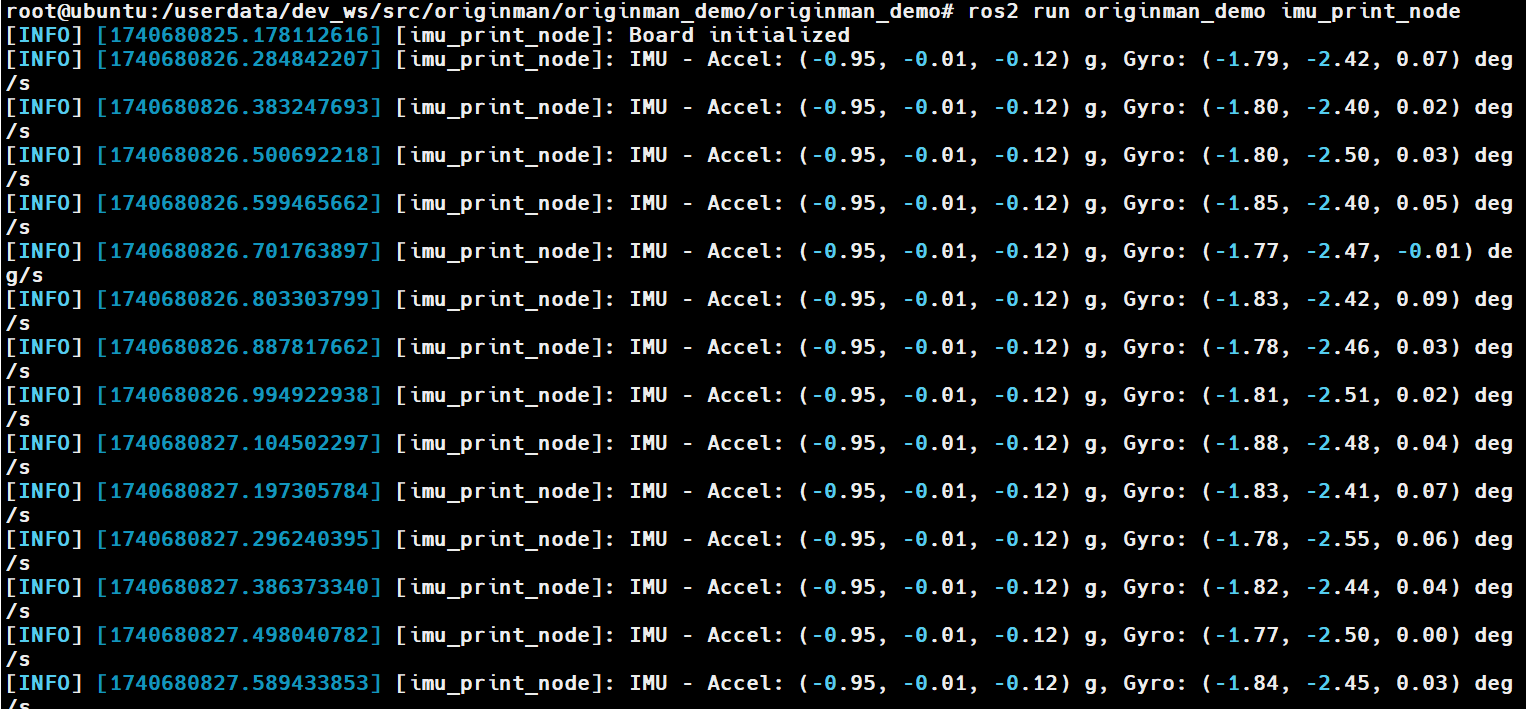
You will quickly see the IMU content being published in the terminal:

Code Implementation
The code implementing this functionality is in originman_demo/imu_print_node.py. Here's the detailed implementation:
#!/usr/bin/env python3
import sys
import os
# Add current script directory to sys.path
sys.path.append(os.path.dirname(os.path.abspath(__file__)))

import rclpy
from rclpy.node import Node
import time
from ros_robot_controller_sdk import Board


class IMUDisplayNode(Node):
    def __init__(self):
        super().__init__('imu_print_node')
        self.board = Board(device="/dev/ttyS1", baudrate=1000000)
        self.board.enable_reception()
        self.get_logger().info("Board initialized")
        time.sleep(1)  # Wait for 1 second
        self.timer = self.create_timer(0.1, self.display_imu_callback)  # Read every 0.1 seconds

    def display_imu_callback(self):
        imu_data = self.board.get_imu()
        if imu_data is not None:
            ax, ay, az, gx, gy, gz = imu_data
            self.get_logger().info(f"IMU - Accel: ({ax:.2f}, {ay:.2f}, {az:.2f}) g, Gyro: ({gx:.2f}, {gy:.2f}, {gz:.2f}) deg/s")


def main(args=None):
    rclpy.init(args=args)
    imu_print_node = IMUDisplayNode()
    rclpy.spin(imu_print_node)
    imu_print_node.destroy_node()
    rclpy.shutdown()


if __name__ == '__main__':
    main()
Image Publishing
Running the Example
After powering on OriginMan, you can start the following command in MoboXterm or VSCode:
You will quickly see the robot's image publishing output information in the terminal:

Code Implementation
The code implementing this functionality is in originman_demo/image_display_node.py. Here's the detailed implementation:
#!/usr/bin/env python3
# encoding:utf-8
import rclpy
from rclpy.node import Node
import cv2
from cv_bridge import CvBridge
from sensor_msgs.msg import Image


class ImagePublisherNode(Node):
    def __init__(self):
        super().__init__('image_publisher_node')
        self.bridge = CvBridge()
        # Create publisher for image_raw topic
        self.publisher_ = self.create_publisher(Image, 'image_raw', 10)
        # Open camera, 0 represents default camera
        self.cap = cv2.VideoCapture(0)
        if not self.cap.isOpened():
            self.get_logger().error("Cannot open camera")
        else:
            # Create timer to publish images periodically
            self.timer = self.create_timer(0.1, self.publish_image)

    def publish_image(self):
        ret, frame = self.cap.read()
        if ret:
            try:
                # Convert OpenCV image to ROS image message
                ros_image = self.bridge.cv2_to_imgmsg(frame, "bgr8")
                # Publish image message
                self.publisher_.publish(ros_image)
                self.get_logger().info('Publishing image')
            except Exception as e:
                self.get_logger().error(f"Error converting image: {str(e)}")
        else:
            self.get_logger().error("Cannot read image frame")

    def __del__(self):
        # Release camera resources
        if self.cap.isOpened():
            self.cap.release()


def main(args=None):
    rclpy.init(args=args)
    image_publisher_node = ImagePublisherNode()
    rclpy.spin(image_publisher_node)
    image_publisher_node.destroy_node()
    rclpy.shutdown()


if __name__ == '__main__':
    main()
Controlling OLED
Running the Example
After powering on OriginMan, you can start the following command in MoboXterm or VSCode:
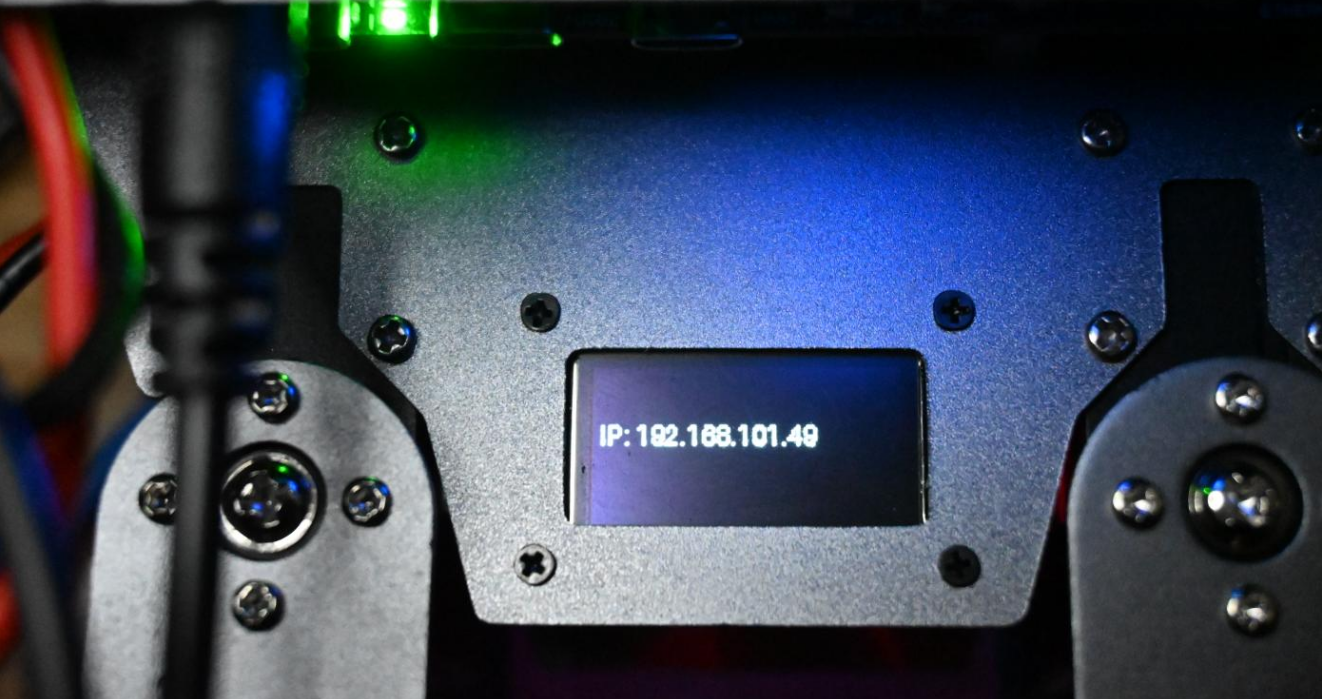
After successful execution, you will see the Wlan0 IP address displayed on the OLED screen on the back of OriginMan.

Code Implementation
The code implementing this functionality is in originman_demo/oled_display_node.py. Here's the detailed implementation:
#!/usr/bin/env python3
import rclpy
from rclpy.node import Node
import time
import numpy as np
import Adafruit_SSD1306
from PIL import Image, ImageDraw, ImageFont
import socket
import subprocess


class OledDisplayNode(Node):
    def __init__(self):
        super().__init__('oled_display_node')
        # Initialize OLED display
        self.screen = Adafruit_SSD1306.SSD1306_128_64(rst=None, i2c_bus=5, gpio=1, i2c_address=0x3C)
        self.screen.begin()  # Start screen
        self.screen.image(Image.fromarray(np.zeros((64, 128), dtype=np.uint8)).convert('1'))
        self.screen.display()

        # Load font
        self.font = ImageFont.load_default()

        # Create timer to update display content every second
        self.timer = self.create_timer(1.0, self.update_display)

    def get_wlan0_ip(self):
        """Get wlan0 IP address, return None if not connected"""
        try:
            # Use ifconfig to get wlan0 IP address
            result = subprocess.check_output(["ifconfig", "wlan0"], text=True)
            for line in result.split('\n'):
                if "inet " in line:
                    ip = line.split('inet ')[1].split(' ')[0]  # Extract IP address part
                    return ip
            return None  # If no inet line, means not connected
        except subprocess.CalledProcessError:
            # If ifconfig wlan0 fails (e.g., interface doesn't exist or not enabled)
            return None

    def update_display(self):
        """Update OLED display content"""
        # Create blank image
        img = Image.new('1', (self.screen.width, self.screen.height), color=0)
        draw = ImageDraw.Draw(img)

        # Get wlan0 IP address
        ip_address = self.get_wlan0_ip()

        if ip_address:
            # If IP address exists, display "IP: xxx.xxx.xxx.xxx"
            display_text = f"IP: {ip_address}"
            draw.text((3, 22), display_text, font=self.font, fill=255)
        else:
            # If not connected to network, display "Network not connected"
            draw.text((3, 22), "Network not connected", font=self.font, fill=255)

        # Update screen display
        self.screen.image(img)
        self.screen.display()


def main(args=None):
    rclpy.init(args=args)
    oled_display_node = OledDisplayNode()
    rclpy.spin(oled_display_node)
    oled_display_node.destroy_node()
    rclpy.shutdown()


if __name__ == '__main__':
    main()
